|
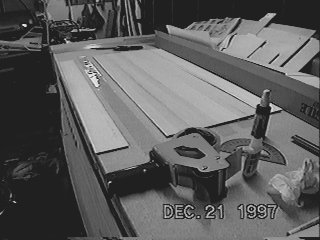
Here I'm gluing up sheeting for the wings. The process begins by selecting
3" wide pieces that fit reasonably well. They don't have to fit perfectly
for this method. There should be no large gaps when you push the pieces
together, however. Once you've decided which two pieces to glue together,
cut a long piece of cellophane packing tape, 2" or so longer than the balsa
planks. (note the tape roller in the lower center of the picture) Lay the
tape sticky side up on the table between the planks. Lay the first plank
on the tape, covering half of the tape and leaving the other half exposed.
Now starting from one end, butt the two planks together sticking the second
piece to the tape, pushing them together as you go. A firm, hard surface
is best for this.
|
 |
The sheeting is glued to the wing. Note how smooth it looks. Using this method I was able to use thick CA to glue the sheeting to the ribs. After all the shimming and sanding I was able to achieve a nearly perfect fit. After turning the wing over I saw that the sheeting was firmly glued to all of the ribs and almost no gaps were found. It was a challenge getting the thick CA on all of the ribs, LE, etc. and positioning the sheeting before it cured. If the wing were much bigger I would have had to use something slower like alphatic resin glue. The slow CA has the advantage of fast tacking. With the alphatic resin glue, inevitably some part doesn't get pinned down well enough and since it takes an eternity to dry, I've had problems with the surfaces pulling apart and drying that way. |
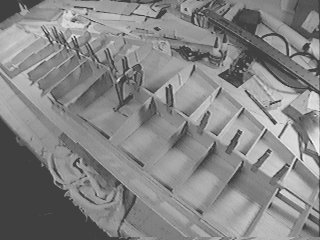 |
With the top sheeting on both wing halves, I butted them together upside
down and epoxied in the main wing dihedral brace, W2. Note that the washout
is not fixed yet - that doesn't happen until you sheet the second surface.
With top and bottom sheeting glued in place the wing becomes rigid. At
this point, only W2 is holding the wing halves together. I did some shaping
of the center wing mating surfaces (spars & sheeting) before this glue-up.
Note that I extended W2 to span both spars. The plans called for W2 to be glued only to the lower spar and extend another 1/2" or so upward from the bottom spar. To me this looked weak, and didn't give enough strength for negative Gs. I don't plan on doing alot of outside manouvers, but you never know when you can get into weird manouvers accidentally. Besides, I never skimp on strength when it comes to wing spars. A few extra ounces of weight is well worth it here, in my opinion. |
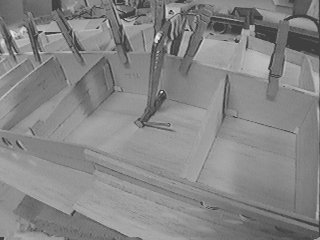 |
The dihedral brace W2 clamped in place. 30 minute epoxy was used, as I always do when joining birch ply to balsa in high stress areas. Note the 3/32 plates that held the ribs together before W2 was in place. I sawed through them and then slid W2 into the slot. Note the small shims between the lower part of the ribs and W2. These were used just to put more pressure against W2 on the bottom since I couldn't clamp down there. I guess I should get myself some more deep-jaw clamps, the one in the picture is the only one I have :-) |
 |
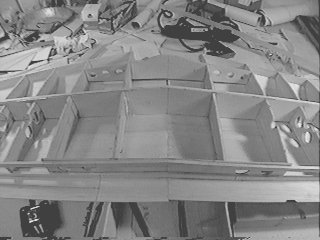
Another view of the W2 glue-up. I couldn't clamp W2 to the upper spar,
but I found that the rear ribs (with shims) applied enough pressure to
keep W2 firmly against it.
This is an exciting step, because the wing finally begins to take shape! |
 |
The wing center section with W1, W2, & W3 now glued in place. The correct shape for W1 turned out to be with a slight dihedral on the upper edge. The plans only show half of this piece with a center line. My best attempt at lining this up resulted in a piece with a nearly flat top edge, which didn't fit. Once again I would recommend using cardboard test pieces here to avoid wasting time and plywood. W2, incidentally, worked out fine when cut from the plans. The plans show both sides of W2, so it's harder to goof. |
 |
The retract plate support doublers are glued in place with epoxy. Note
also the 1/2" triangle stock to reinforce the W2/doubler joint. This is
a bit different than the structure called for on the plans. I used thicker
plywood - 1/8" ply for the doublers and 1/4" ply for the plate.
After seeing too many models with retract support structure ripped out, or with retracts damaged through hard landings, I have arrived at my current thinking. The idea is to make the fasteners that hold the retracts to the wing weaker than either the supporting structure or the retract units. That way in a hard landing, it is the fasteners that fail and nothing else. I use nylon bolts, 8-32 in this case. I've found these to be very strong in the past, too strong in fact for my Dynaflite Spitfire. Its retract rails were ripped out with 8-32 nylon bolts! |
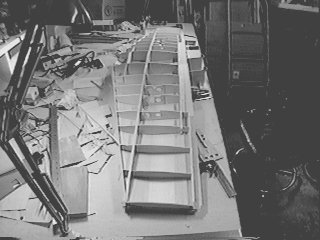 |
The wing from above, in the building jig. I decided a fixed jig was
the best way to align the wing. Other methods could be used, of course.
While building the stab, I finally discovered the truth about when a rib-and-skin structure becomes rigid. The stab remained flexible with one side sheeted, but became quite rigid once the second skin was added. Armed with this knowledge :-) I came up with the idea for jigging the wing. |
 |
Here is the main part of the jig. Using the templates for rib #1, I cut these supports from 1/8" lite ply. I glued small plywood blocks to their sides next to the top for pinning through the wing (one is just visible on the right side in the picture). These supports are cut so that the wing root is at 0 degrees incidence to the building board. The idea is to then block up the wingtips until the proper washout is achieved. |
 |
Here is the wingtip, blocked up to it's proper -1.5 degrees incidence. Because the wing is upside down, of course, this means that the tip is higher than the trailing edge. |
 |
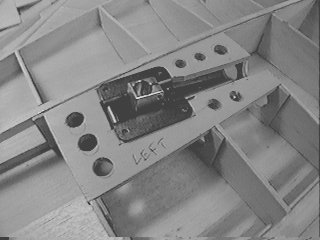
Here is the retract support plate glued in place. |
 |
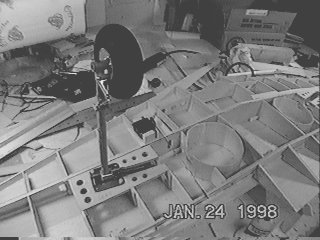
Here is the plate with the retract installed. |
 |
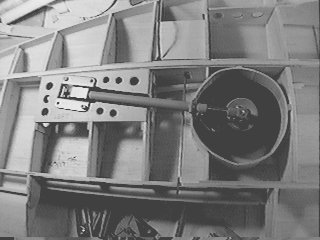
Here it is with the stru attached. The standard 631 struts were too short, I had to exchange them for longer ones. The folks at Robart managed to turn this around in less than three weeks, I was grateful for that. They didn't charge me for it either. They are making points with me :-) |
 |
Here the strut is in the retracted position. The flap control rod clears the strut with room to spare. I really like the look and feel of the 631 retracts. They are the first "serious" retracts I've ever owned. They sure look and feel alot more robust than the lesser retracts I've owned. |